


PDF sewing patterns are truly an amazing new part of the sewing world. Whether you’ve been sewing for years with tissue patterns, or if you have never sewn at all, you can easily learn how to sew with PDF patterns. Here’s how to use PDF sewing patterns!
Why PDF Sewing Patterns?
I’ll list a few reasons why I love them:
- The instructions from many designers are phenomenal and come with pictures! Which is especially useful for beginners.
- The size range is fantastic. Women’s patterns, for example, can go from tween sizes through women’s 5XL. So you can buy one pattern and have the ability to make it for you and pretty much anyone other sized person.
- Once you have the pattern, it’s yours. You can reprint it as many times as you want. (I don’t reprint my already correct sized and printed patterns. I’ll show you how I store them later in the post).
- Most independent clothing pattern designers use a group of everyday people to test their designs before they are sold. This translates to two great outcomes: The pattern is tested on every size. Have you ever made a garment from a pattern and thought, “this would look good on such and such type of body, but it doesn’t work for me.” Well, the designers get to look at every size to make sure the fit is right.
- Because of this method of testing, you get to see pictures of the garment on people in a variety of sizes and types of bodies, as well as in different fabrics for ideas.
Have I got your attention now? (Because PDF patterns really do rock!).
Okay, on to the step-by-step Guide.
PDF Sewing Patterns 101
Step 1 – Choose a Pattern
There are PDF sewing patterns for literally everything. Dresses, wallets, shoes, purses, shirts, pants, hats, gloves, leggings, stuffed animals…you name it.
Below are a few designers I like to help get you started. Most, if not all, of the independent, or indie, pattern designers have at least one free pdf sewing pattern listed on their website. Many of them require you to join their Facebook group to obtain the free pattern code that you input on their website.
Click on the pattern designers below to check some out!
Short List of Indie Pattern Designers – Click any title to see the patterns
- Ellie and Mac – Clothing for everyone! Lots of trendy clothes patterns. They also have craft patterns, embroidery designs, and cut files (for a Cricut or similar). Lots of great sales and a great following. See my Ellie and Mac Posts HERE.
- Patterns for Pirates – Clothing for everyone. They have quite a few freebies including the famous pegs which are everyday leggings. Lots of cute patterns and their fanbase is large. Click for P4P posts HERE.
- Love Notions – Clothing for women, men, children, dolls. Click HERE for my Love Notions Posts.
- Designer Stitch – Sewing patterns for women. Very experienced designer who also owns a sewing school. Great drafting. Click HERE for my Designer Stitch blog posts.
- Peek a Boo Pattern Shop – Clothing for women, men, children. Lots of fun freebies including kids costumes.
- Bella Sunshine Designs – Clothing for women, men, children, dolls. Click HERE for BSD posts.
- Itch to Stitch – Clothing for women. Widely known as a very precise designer with great drafting.
- Made for Mermaids – Clothing for women, men, children, and dolls. The sister of the designer of Patterns for Pirates. Lately focused on their “lace and lounge” collection, which is really cute. Click for M4M posts HERE.
- Winter Wear Designs – Clothing for women, men, and children. Not just winter clothes! The designer’s last name is Winter.
- George and Ginger – Women’s clothing. Very well designed patterns. Lots of edgy unique patterns too. The designer also does runway shows in places like New York City. Click HERE to see George and Ginger blog posts.
- Jalie – Clothing for women including outerwear, casual wear, and active wear. Jalie’s been around since 1983 and there’s a reason.
- Sinclair Patterns – Clothing for women and men. Known for great drafting and quality patterns. when you purchase a pattern, you get actually get three files including – petite, regular, and tall.
- Greenstyle Creations – Clothing for women, men, children. Focus on athletic wear.
- You Make HQ – Clothing for everybody, lots of cute dress sewing patterns. They also have cute kids stuffed animal patterns, plus bags, and crafts. The drafting has always been good to me. Used to be called Rebecca Page Patterns, find my Blog Posts HERE.
Onto the next part!…
Step 2 – Print the Pattern
After choosing the PDF sewing pattern, you will need to download it to your computer and then open the file with Adobe Acrobat. If you don’t have Adobe Acrobat, you can download the free reader version here on the Adobe website.
Then, you will choose if you want to print the pattern at home or send it to a print shop. The following instructions are for printing your pattern at home:
First, DO NOT try to print the file from a web browser (again, you need to use a program like Adobe Acrobat Reader, see above).
If the pattern you download has both Letter and A4 files, be sure to open the correct one depending on the size paper you have (generally “Letter” sized in the US and “A4” elsewhere. AO is the big blueprint sized version which can be printed at a print shop).
If you are printing a clothing pattern or , you will need to locate your size in the size chart. If your measurements fall into more than one size, no worries, you can easily grade between sizes to achieve the best fitting garment.
Most good pattern designers these days will include layers in the pattern, which means you can deselect the sizes you don’t need and only show the sizes you do. This makes it much easier to assemble the pattern and cut on the correct size lines.
Selecting Size Layers
Refer to picture below.

On the left hand side of your Adobe Acrobat program screen (or the bottom right hand if your version of Reader has been updated), you will see a side bar with some icons. Click on the icon that looks like 4 sheets of paper stacked on top of each other (blue in the picture above).
Now, let’s say your (or your model’s) measurements fall into three different sizes – 8,10, and 12. Deselect all the sizes you don’t need and only leave the eye icon in the boxes for the sizes you want.
Great, only those three size lines will be visible on your print out.
Below that you may see some extra options. In this example, Bella Sunshine Designs offers a few different ways to assemble the pattern. I use letter paper and prefer trimless pages so that I’m not cutting more than necessary, so I have “Trimless – Letter” selected.
Keep in mind some pattern companies will have options that say something along the lines of “on all layers, keep checked”. If you deselect that option, all the labels and some of the lines will disappear!
Print Only What You Need!
Once you have decided on the size, decide what version of the pattern you would like to make (if applicable). If there are many different options in the pattern, many designers will include a chart of which pages to print in order to save paper.
For example, if you want to add a hood or a sash, those will be on additional sheets of paper. If you aren’t adding those, don’t bother printing!
Then, see the highlighted numbers in the photo below? You can enter whichever pages you need to print in that box. It may even look something like:
1-6, 13-19, 21, 23, 25-50
I even go through each page with the arrow forward button. If there are no pattern lines of my size on a page, I don’t include it in the print pages.
Before you hit print, read the text below!!
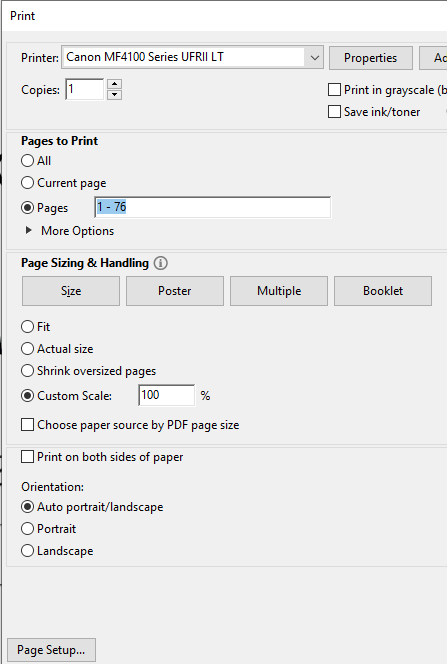
This part is really important! Make sure your print setting are correct or the pattern will not print to the correct scale!
Refer to picture above. You want to select:
- Under paper sizing and handling, choose “custom scale” and enter ‘100“% in the box.
- Orientation should be “Auto portrait/landscape“
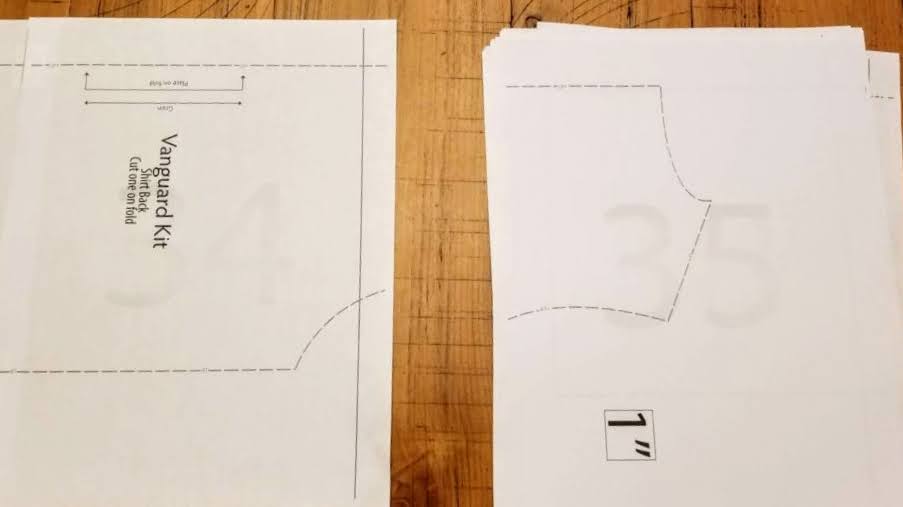
Generally on the first page of the pattern pieces, there will be a square or rectangle that will be marked as its size. The shape is usually 1″-3″ to make sure that your printer printed the correct size.
If this measurement is off, the whole pattern’s scale will be off. As long as you printed correctly and your printer is configured properly, the square or rectangle should always be the right size.
For the first couple of times you print PDF sewing patterns (or if you get a new printer), I recommend printing only the first page to check that the measurement is correct. If it is, then proceed with printing the rest of the pattern pages.
Step 3 – Assemble the PDF Sewing Pattern
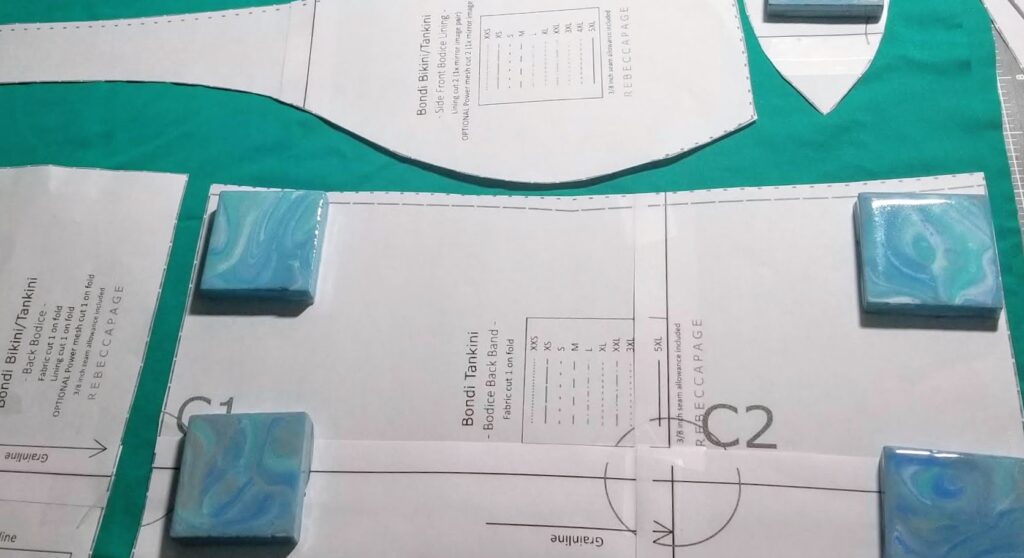
After you have everything printed, it’s time to tape or glue all the pattern pieces together and cut them out (If you choose to print an AO document, you would not need to do this, however you would need to trace out the size you need onto another type of paper if you order a document with all sizes included).
What’s the Best Method?
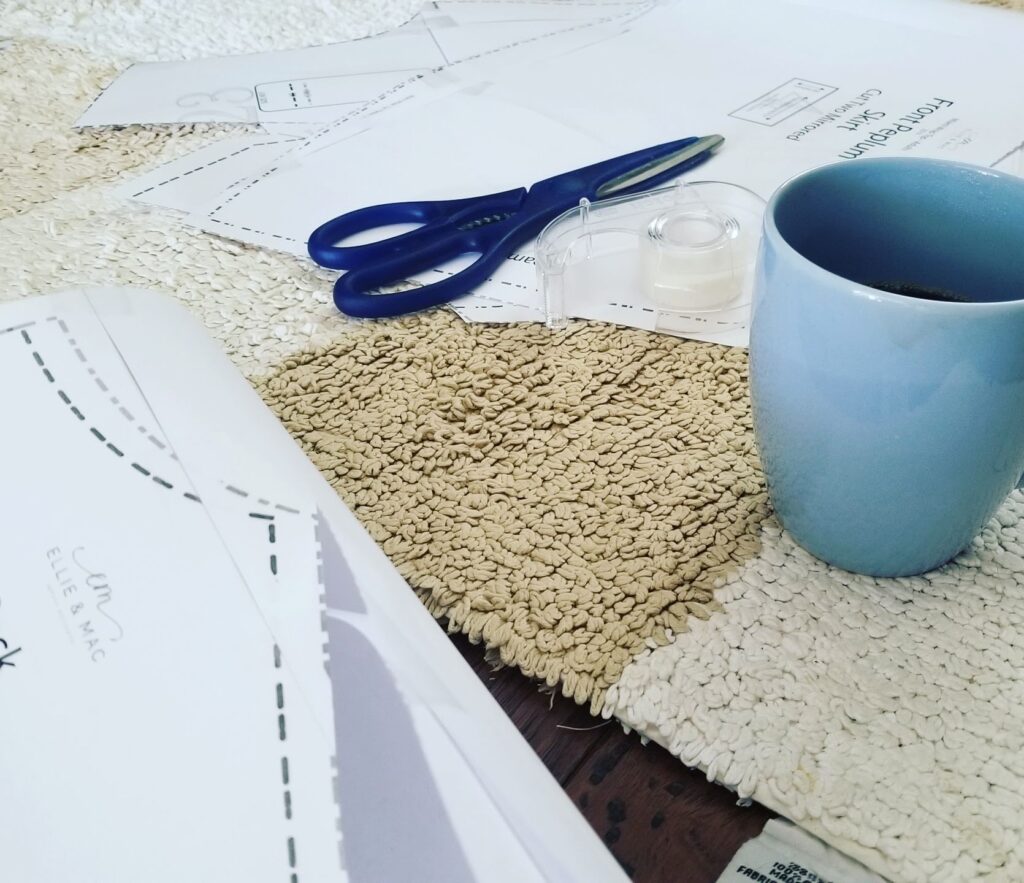
I like to use scotch tape and a regular pair of paper cutting scissors. Some people prefer to use a glue stick or masking tape. Do what you like!
Generally, for trimless pages, you will just align one side of a paper to a line on another paper and tape! Really simple, If it’s not trimless, you can match up the lines by looking through the paper (a lightbox or window is great for this), or you can trim the paper first. But honestly, I’ve never trimmed it.
Every designer will label their pages slightly differently. Some will have a letter and number order, ie, A1, A2,A3 would be the first row and B1,B2,B3 would be the second row. Other designers use just letters or just numbers and some use an assembly chart akin to a jigsaw puzzle.
But in the end you should have a large taped together pattern ready to cut out.
And…cut it out!
Step 4 – Cut Fabric
Make sure to read through the PDF sewing pattern’s cutting instructions first to make sure you are using the correct pattern pieces for the option you want to make (e.g. different pocket types or neckband choices).
Then cut out your beautiful fabric! I like to use a rotary cutter on a healing mat with my scissors nearby to cut anything that needs a precision angle.
Step 5 – Sew it and Show it Off!
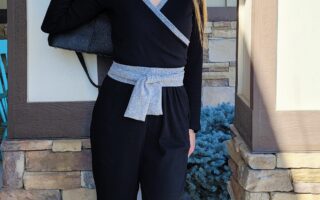
I made all these clothing items you see below with Ellie and Mac PDF sewing patterns including the pdf dress sewing patterns, shirt patterns, leggings pattern, skirt pattern, and more!

Now, just follow the detailed instructions in the PDF Pattern file (and perhaps the video sewing tutorial) and sew up your new handmade item. You can print out the instructions for reference or just use an electronic device like a phone or tablet to access the Instruction PDF.
Make sure to join the Facebook group of the pattern designer if you have any questions. There are so many people willing to answer your questions in these groups!
Step 6 – Storing Patterns
There are many ways to store PDF sewing patterns. Bags, envelopes, on hangers, rolled up…
I like to use gallon sized plastic storage bags (bonus if you can re-use them from the kitchen!). I fold all the pattern pieces into one bag. Then label the front with the pattern designer, pattern name, and size if applicable. Plus any options included in the pattern that I want to be sure to remember.
I then store each bagged pattern in a file folder organizer box in alphabetical pattern by pattern designer.
Some people like to use manila folders with the first page of the PDF sewing pattern taped onto the front. Others like to hang up their patterns unfolded on pants hangars. Still other sewists roll their papers and store them like wrapping paper.
This part is completely up to you!
Have Fun!

I hope you have a blast exploring the world of PDF Sewing Patterns! Don’t be scared and just dive right in. These really are the best patterns out there with the most detailed instructions and great support. And there are a ton of pdf sewing patterns for beginners! A great way to get started is by using the free sewing patterns that most of the pattern companies have on their websites.
If you have any questions, please ask in the comment section below. I’d love to help!
Want to connect with me further? Join me on Instagram at www.instagram.com/sewletsgohobby
Happy Sewing!
*This post contains a few affiliate links. They are here purely to help fund the blog and my hobbies so I can bring these posts to you!

Thanks for your tips! I have started a collection of PDF Patterns.
Certainly! Glad it helped.
[…] This is a PDF sewing pattern. If you’ve never sewn using a PDF pattern before, you can check out my comprehensive guide to PDF sewing patterns post HERE. […]
[…] the way, if you aren’t familiar with PDF patterns, you can check out my PDF 101 post HERE which is a comprehensive step-by-step guide to PDF […]
Thank you for the tips. I am basically a beginner sewing, have not done any since high school home ec class (won’t say the years!!)
Oh, glad you found it helpful! Goodluck with your sewing adventure!
I want to learn how to sew
what changes do I make to a pattern when I’m 5’3″ with shorter body length, besides shortening length
Since at 5’3,you are usually only 1 to 2 inches shorter than pattern height, it’s a small adjustment. In general you can take half of your height difference out of the pattern. And I would distribute that through the garment. So for a shirt, if you you are 2″ shorter than drafted pattern height, I would take a total of 1″ out of the top. A half inch near the waist and a half inch at the hem for example. You can also measure your side waist (Google for how to do that), most patterns are drafter for an 8″ to 8.5″ side waist. You may find that your torso or legs are longer and you actually don’t need to adjust as much in one area based on height. Hope that helps!
[…] (Never sewn a PDF Sewing Pattern? Check out my Comprehensive Beginners Guide to PDF Patterns Post HERE!) […]
[…] The Favorite Sweater sewing pattern is a PDF pattern designed by Ellie and Mac. If you aren’t familiar with PDF sewing patterns, you can read through my comprehensive beginners guide to PDF patterns on the blog by clicking HERE. […]
[…] sure how to print the PDF pattern either? Click HERE to go to my comprehensive guide to PDF Sewing Patterns Post where I take you through step-by-step […]
[…] printed in whatever size(s) you choose. (Not sure what a PDF Pattern is or how to use one? Click HERE to see my in depth post about PDF Sewing […]
when i print my patterns it seams like the very last line witch happens to be the square to measure cuts off right at where the line should be .will this affect my pattern or do you have any idea on how to fix the problem thanks jess
Do you mean that the test square isn’t measuring correctly? You would need to adjust your printer settings to make sure that it is correct first.
[…] PDF Patterns 101 – A Complete Step-by-Step Guide […]
[…] PDF Patterns 101 […]
This guide is so helpful! I’ve been hesitant to try PDF sewing patterns, but your step-by-step instructions make it seem much more approachable. I can’t wait to dive in and start my first project! Thank you for sharing!
I’m glad you found it helpful!
[…] Find it by clicking here – PDF Sewing Patterns 101 – A Complete Step-by-Step Guide […]
[…] The free sewing pattern we chose to make was the Free Mika Bomber Jacket Pattern from Tiana’s Closet. It’s a PDF Sewing pattern. If you’d like to learn more about PDF sewing patterns, you can find a great beginner tutorial that walks you through each part of PDF patterns and why they are great by clicking here – PDF Sewing Patterns 101 – A Complete Step-by-Step Guide […]
This guide is incredibly helpful! I struggled with sewing patterns before, but your step-by-step breakdown makes it so much clearer. Can’t wait to try out my first PDF pattern! Thank you for sharing this valuable resource!
This guide on PDF sewing patterns is a game changer! I loved how comprehensive it is, especially for beginners like me. The step-by-step instructions made it so easy to follow. Can’t wait to start my first project. Thank you for sharing such valuable tips!