Follow or Share the Hobby Love!:
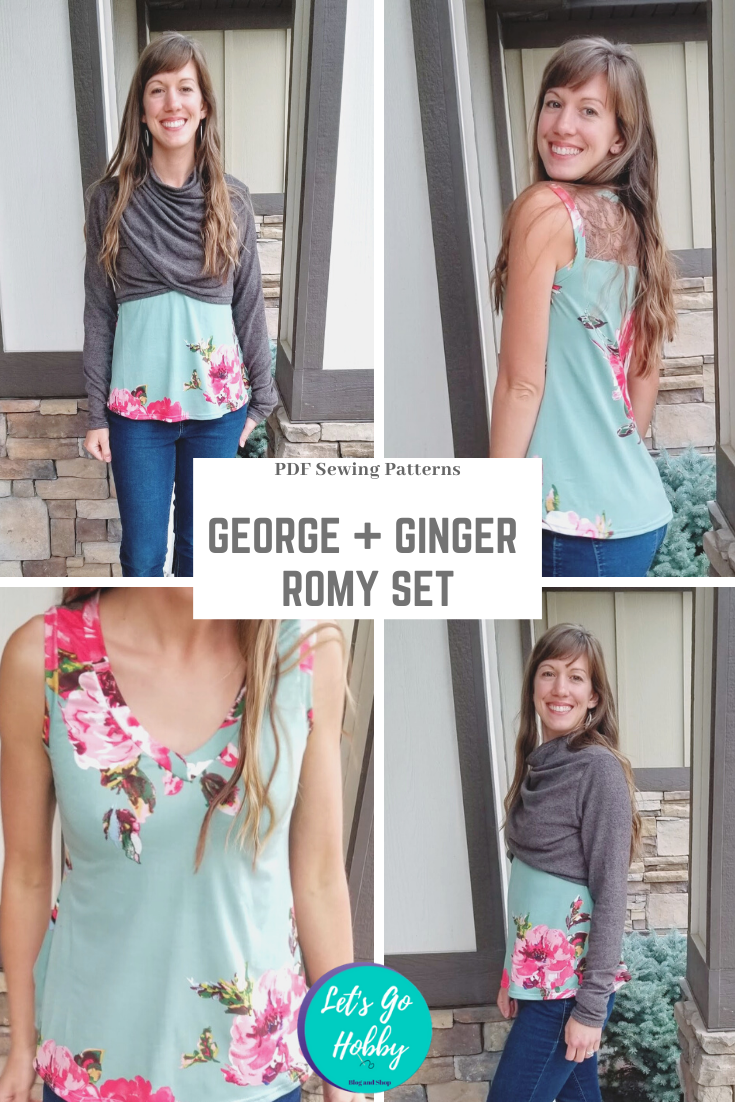
This is my first Ellie and Mac sew – The Ruched Tee.
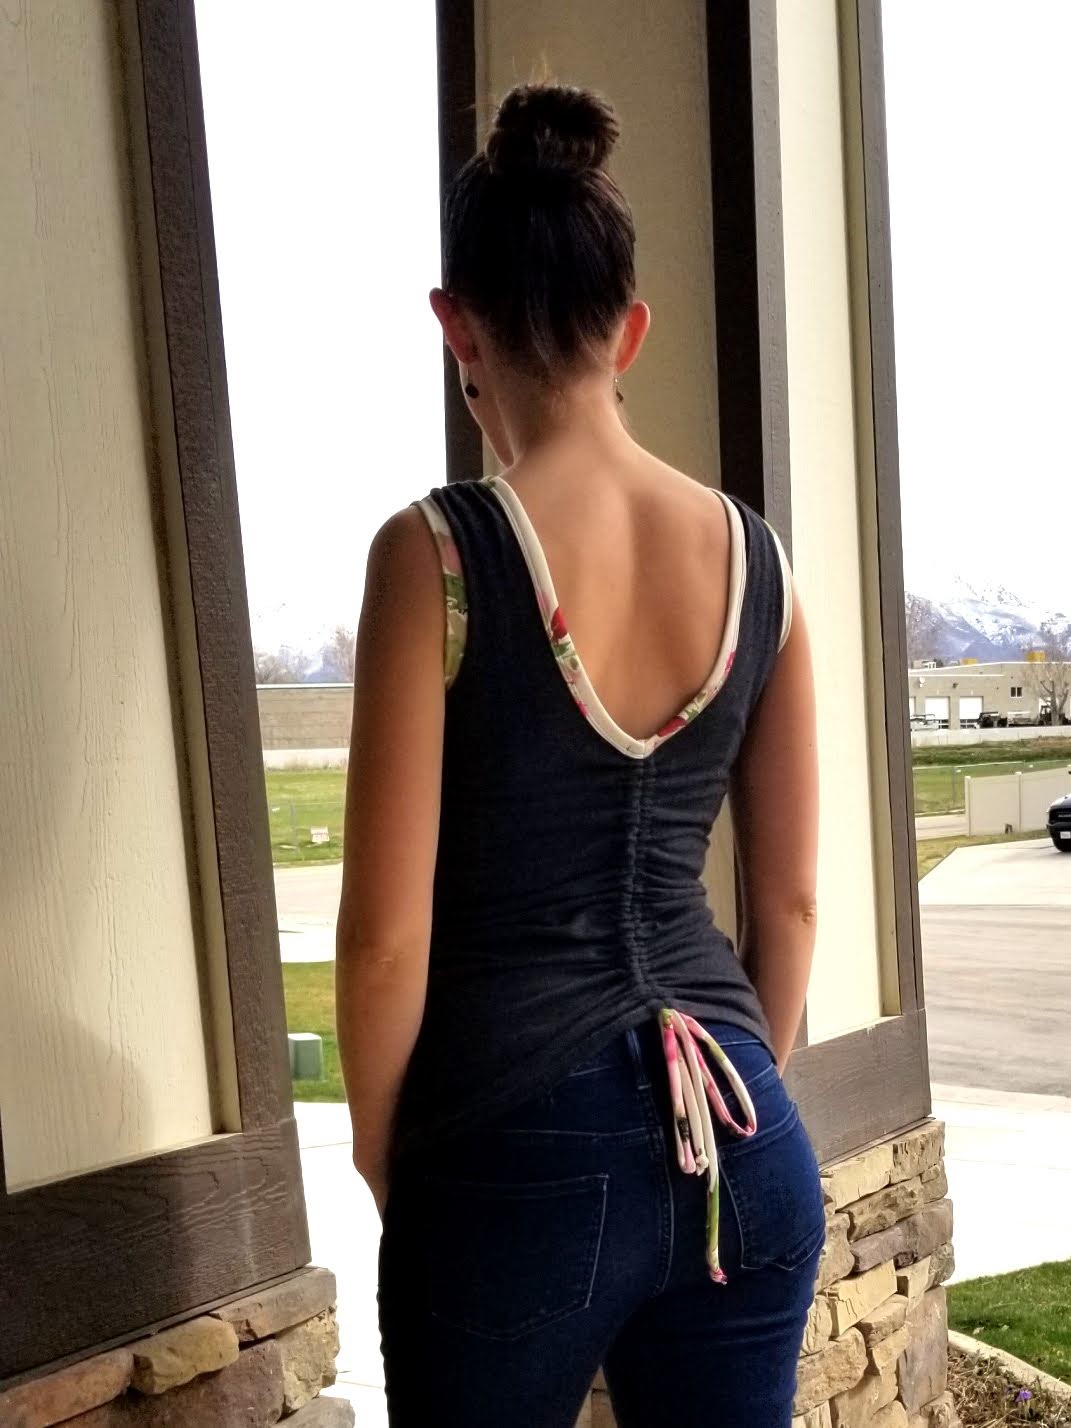
The front of this shirt is cute, but the back is AMAZING. Check out the V-back and ruching ties. The awesome part is that you can pull the ties as tight or loose as you choose, they are not fixed. So you could let out some of the ruching for more coverage, or make it really high for a workout shirt or a hot summer day.
There are three bodice ease options on this pattern. This is the slim fit version. There are also fitted and a relaxed cut lines.


The neck is closed using a binding and the arms on this are banded. The pattern does have the options for short and long sleeves as well.
I thought the pattern might be complicated with the casing, but it was actually really simple. And the instructions were step-by-step with pictures.
This post contains affiliate links.

I had some gaping at the front of the neck binding because my main fabric was not as stretchy as the binding (cotton spandex vs DBP). I also have narrow shoulders.
But, I should have known when I quartered the neck binding and didn’t need to stretch it at all onto the shirt’s neckline, that there was an issue! My fix for this was to add some elastic to the shoulder seams.
I tried two different methods to find out what I liked best. I cut a piece of 1/4″ elastic about an inch longer than the shoulder seams (so that I could hold onto the end easier while sewing it).
- For the left shoulder, I did a straight stitch (stitch length 4) all the way through all layers of fabric. As soon as I got stitched a few stitches forward and then back stitched, I pulled the elastic taut across the seam (but did not pull the garment at all).
- For the right shoulder, I only sewed through the shoulder seam allowance so that the stitches would not be visible on the right side of the garment. I used the same method as the other shoulder, except I used a zigzag stitch instead of a straight stitch since the seam allowance is only two layers of fabric and I didn’t want the stitches to pop.

Below is the result:


It was a lot easier to feed the elastic through on the left shoulder with the straight stitch, but the right shoulder seam is cleaner on the outside of the garment. I like the effect of the ruching better on the left shoulder though. So I would say, if you want the ruched area to be tighter, go all the way through the layers. If you don’t want the stitches to show, use the seam allowance. This might have been more effective had the band not been added yet, since I could only sew over so far on the edges.
This fixed it enough for my liking.

And the back is just so darn cute.
 |
| My photographer is only 3.5 feet tall, so I guess cutting heads out is expected occasionally. |
You can find the Ellie and Mac Ruched Tee HERE. If you look at the listing, you’ll see the other versions of the shirt with more ease.
I plan to make a fitted or relaxed fit tee next time!