
If you are looking for a beautiful sweater sewing pattern for an off shoulder top, look no further! The Favorite Sweater from Ellie and Mac Patterns is gorgeous with lots of options and no hemming!
I did make a slight modification to my sweater which I will detail later in the post! Read on to see all the details for this cute sweater sewing pattern.
Favorite Sweater Sewing Pattern
So again this pattern is called the Adult Favorite Sweater Pattern. Want to see the pattern listing now? CLICK HERE.
The Favorite Sweater sewing pattern is a PDF pattern designed by Ellie and Mac. If you aren’t familiar with PDF sewing patterns, you can read through my comprehensive beginners guide to PDF patterns on the blog by clicking HERE.
The pattern is made for knit fabric with good 4 way stretch. It does need the stretch, but the recovery can be a little lower since there is elastic in the neckband to keep it on your shoulders.
Here’s the line drawing from the pattern so that you can see all the details on the options:

Pattern Options
The Favorite Sweater Sewing Pattern options broken down are as follows:
Neckline Options –
- Cowl Neckline
- Banded Neckline
Waistline Options –
- Banded Waistline (shirt length)
- Curved Waistline Tunic Length
- Curved Waistline Long Tunic Length
- Banded Crop Waistline (not pictured above)
Sleeve Options –
- Hemmed 3/4 Sleeve
- Banded Long Sleeve
As you can see, there are lots of ways to make this pattern look just a little or a lot different depending on what you choose. Sew your own clothes adventure!
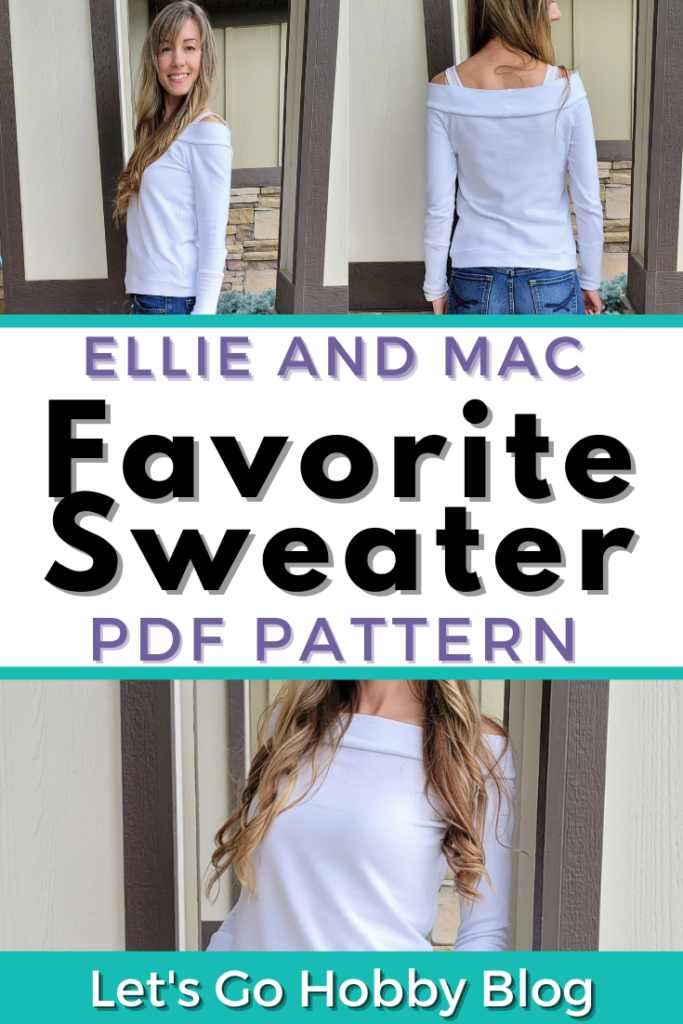
My Sweater Details
So, what options did I pick?

I chose the banded neckline, with banded long sleeves, and the banded hemline. Hey, no hemming!
I used a sweater knit I picked up from Walmart’s remnant fabric area. The fabric is cute, but I will think twice about sewing with it again because it rolled at the edges like nobody’s business. It also struggled when I attached the clear elastic to the banded neckline (don’t worry how to do that is in the PDF pattern file instructions).
I Thought I Ruined it!
I actually thought I had ruined the shirt the night I added the elastic. It looked sooo bad. I went to bed after that. The next day, I had an epiphany to try ironing the seam.
I used a pressing cloth (actually just a fat quarter of quilting cotton works great for this) so that I didn’t melt the fabric or the elastic. Guess what!? It totally fixed the neckline ripples. It smoothed everything out and looked perfect after steaming the seam. Iron’s are magical.
By the way, always use steam or water when ironing knits, it helps you not melt the fabric and it smooths the wrinkles out well. The only exception I know of is when using interfacing, you want to turn the steam off and iron dry for interfacing.
One Small Pattern Hack
I did make one modification to the sewing pattern though. I wanted the bottom of the sweater to sit a bit higher, so I took 4 inches off the shirt length hem. Since the pattern is a bit narrower where I cut the bottom of the pattern piece, I also reduced the band size by the same amount. Easy peasy to shorten a pattern this way!
You may also notice in the picture that it looks like there are straps coming out of the top of the sweater. That’s actually just a ribbed knit tank underneath in white as well. I prefer not to show my straps or wear strapless if I can help it!
You could, if you like this look but don’t want to wear an undershirt, add straps to the pattern. I saw this done recently on the same pattern. The sewist measured from the front seam over her shoulders to the back seam where she wanted the straps to attach to the top and then made a 1″ band (so you would cut the length plus seam allowance by 2.5″). She then attached the bands to the sweater by sewing them into the seam between the cowl or banded top and the bodice pieces. Smart right?

Here’s the back of the Favorite Sweater. I quite like how it shows just a bit of skin. I was worried that I would feel cold in this, but with the extra tank underneath, and the long banded sleeves, I was actually quite comfortable.
I also wasn’t sure if the shirt would stay on my shoulders with this off shoulder style top. But it stays put. I didn’t have to fuss with the sweater at the shoulders at all throughout a full day of wearing it! I think the clear elastic is the reason it stays in the right spot all day.
Elastic Tips
One little pro-tip for you about elastic. Always try the length the pattern recommends on your body in the place the elastic will sit before you cut and sew it into the garment.
So in this case, I exercised the elastic a bit (that means stretch it out before hand so it doesn’t end up substantially longer than the length you cut it). After exercising, I measured the recommended length the pattern suggested, then wrapped it around my shoulders to see how it felt.
It felt great! So, I went with that length. If it had felt to tight or too loose, I would know before wasting time sewing it in just to not enjoy the fit.
Speaking of fit, the beauty of sewing our own clothes, is that we can modify patterns to fit our specific bodies! You might have noticed the slight under arm wrinkles on my sweater. This is to be expected with this type of sleeve, but I think I could reduce them a bit by taking it in at the side seams just a bit on my next make using this pattern. I love that that’s an option with DIY clothes!

Where to Find the Favorite Sweater Sewing Pattern
If you’re interested in seeing more about this pattern or getting the pattern to sew it up, you can find it on the Ellie and Mac website by clicking HERE.
Please ask away in the comments below if you have any questions about the pattern or sewing!
Happy Sewing!
This post contains affiliate links