

You’re probably here to find out about how to lower a neckline on a shirt or dress you are making or have made or even want to change on a store bought garment.
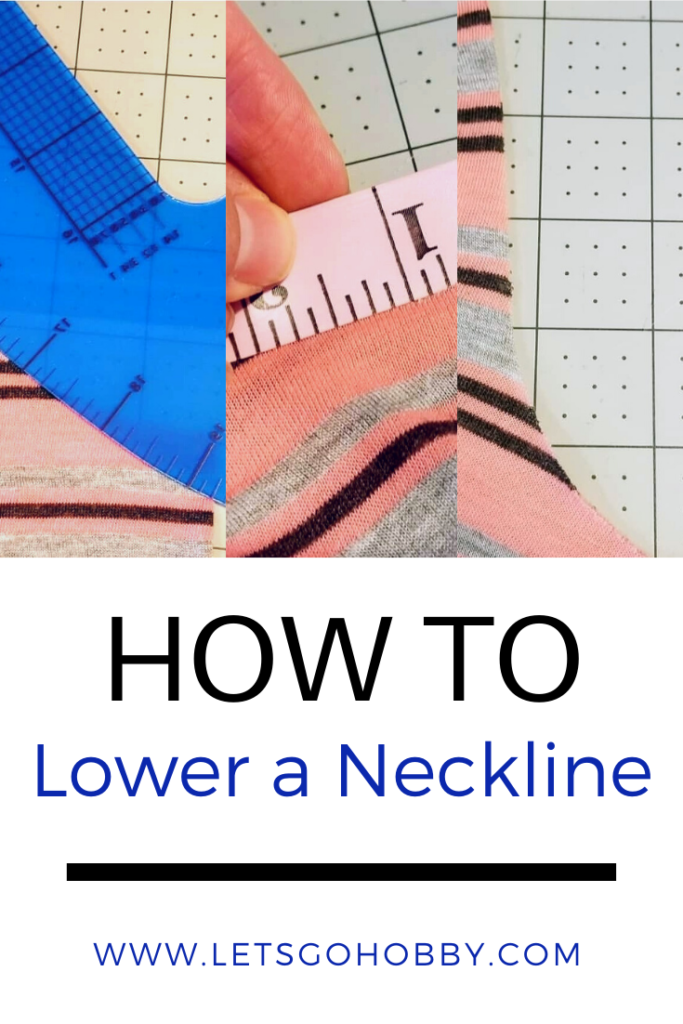
Lowering a neckline on a knit garment is actually really simple. It’s easier with a French Curve Ruler, but not necessary.
I’ve made necklines lower in the past for preference purposes, as well as for nursing access after I had my last baby. It’s actually easier than it sounds. You can lower a neckline as you are cutting out a garment, or lower one after you have the shoulder seams sewn.
How to Lower a Neckline – The Steps
1. Decide how much lower you want your neckline to be. Maybe you just want it dropped an inch, or maybe you need three inches. I would suggest trying on the garment and holding up to your body and using a tape measurer to check where you want the neckline to be.
2. To make the cut, it’s best to use a rotary cutter and a healing mat. You could technically use scissors, but I would trace on the fabric with a fabric pen or tailors chalk first so that it’s as straight as possible.

To use a French Curve : Fold the bodice front wrong sides together along the center front seam (In half like a hot dog bun with the side seams together). Lay the French Curve on top of your folded bodice.
The bottom rounded part of the French Curve should be placed on the center front of the folded bodice the amount you want the neckline lowered. So if you want to drop the neckline one inch, you will overlap the fold one inch down from the top.
Then angle the French Curve up so that the part above the rounded part aligns with the the edge of the original neckline (you don’t want to cut anymore into the top shoulder area unless you want more of a boat neck).
You can weigh the French curve down with pattern weights so that it won’t move. Then trace the line for scissors or use a rotary cutter to cut along the French curve.

Alternatively, without a French curve, you can eyeball this curve. I did this many times without a French curve. You’ll fold the bodice wrong sides together along the center front seam (in the same method as you would with a French Curve).
Start cutting from the edge of the fold, below the bottom of the existing neckline by the amount you want the neckline lowered. Then, just follow the existing neckline curve but begin to shave off less toward the upper part of the neckline until you are cutting nothing off at the top of the existing neckline shape.
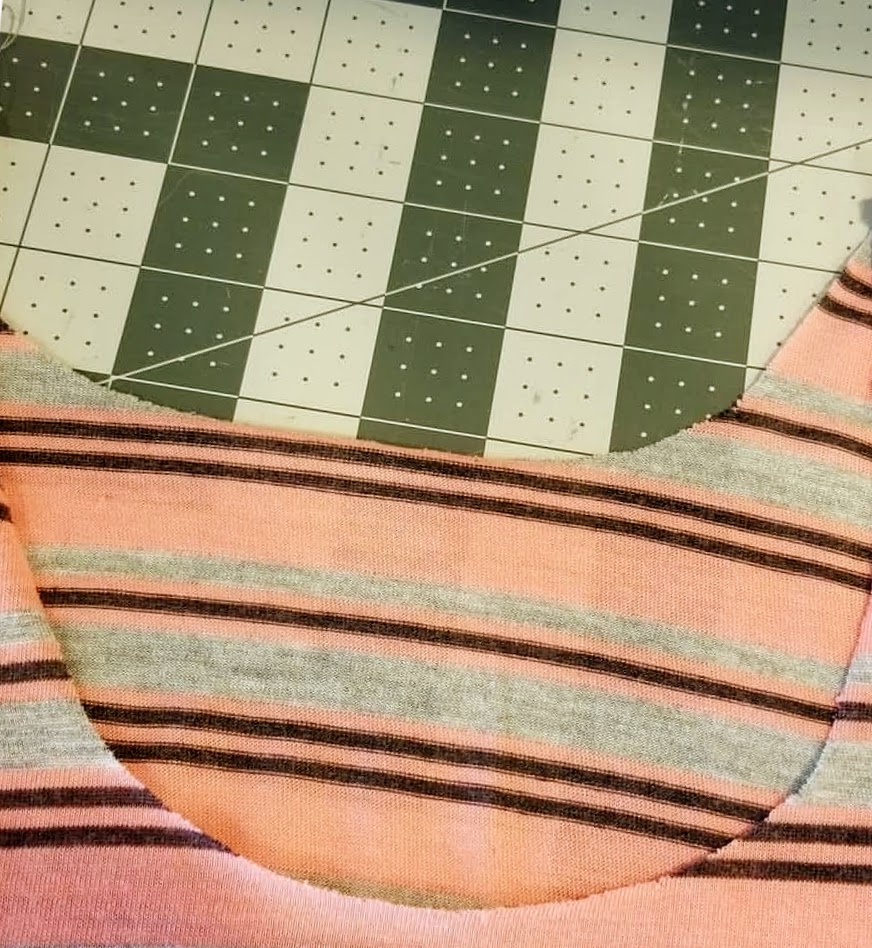
3. After you have made the cut, fold out the shirt and check to make sure you like the look of the neckline. If you want it lower, cut a bit more out. If it’s scary to just cut it, feel free to use a fabric marker first.

4. Sew shoulder seams if you haven’t already. Next you need to measure the new hole you made to find the length of the neckband. Measure all the way around the neckline hole with a flexible tape measurer (or fold it in half, measure that, and double it).

5. Take the measurement around the neck and mutiply it by .8 to .85 to get 80% to 85% of the full neckline measurement (see note below to know what percentage to use). This is your neckband length.
- Note – Neckband widths are usually 1.5″ – 2″. The variation in percentage is due to neckband width and stretch of the fabric you’re using. A wider neckline needs a shorter length. A greater stretch percentage in your fabric needs a shorter neckband. For example, if you’re using DBP, I would use 80% of the length. For hard to stretch cotton spandex (or fabric with tight recovery), you might use 85%.
6. Attach your new neckband by first sewing the short ends of the neckband right sides together, then folding wrong sides together. Quarter the neck hole and neckband then pin or clip the neckband onto the neck hole right sides together aligning the seam in the neckband with the back of the garment. Sew with a stretch stitch or sew the neckband onto the garment. See Graphic below for help with this part or see my post HERE on how to attach a neckband to a garment.

Another Example
Below a neckline that was supposed to be a turtleneck pattern (the George and Ginger Posh Top). I lowered the neckline with the exact technique I outlined above. You can see that blog post HERE.

Let me know if you have any questions by popping them into the comments below or you can find me on instagram at www.instagram.com/sewletsgohobby
Happy Sewing!


[…] to cut the neckline lower to match Miguel’s shirt. Check out this article from Letsgohobby on how to effectively lower a shirt neckline if you want to make this […]
trying this on a storebought knit top. the color was the reason for the purchase but it is in its original state causing issues with thyroid surgery scar really feeling challenge re the back neckline being neatly worked into the new front. phew!!