

While researching ways to make an inseam pocket lay flat, I came across a short blog post about a different kind of inseam pocket. One I had never seen in a sewing pattern before!
This pocket was a slightly different shape than I was used to seeing in patterns and was sewn in differently too. I was intrigued!
So after studying the blog post pictures and info (which you can see HERE from a blog called, “The Beauty of a Stitch”), I tried it out and I really like it.
It’s faster and easier to sew in, and the pocket is sewn into the top of the garment (skirt, pants, etc.) at the waistband too. This really makes a big difference with lighter or stretchier knit fabrics.
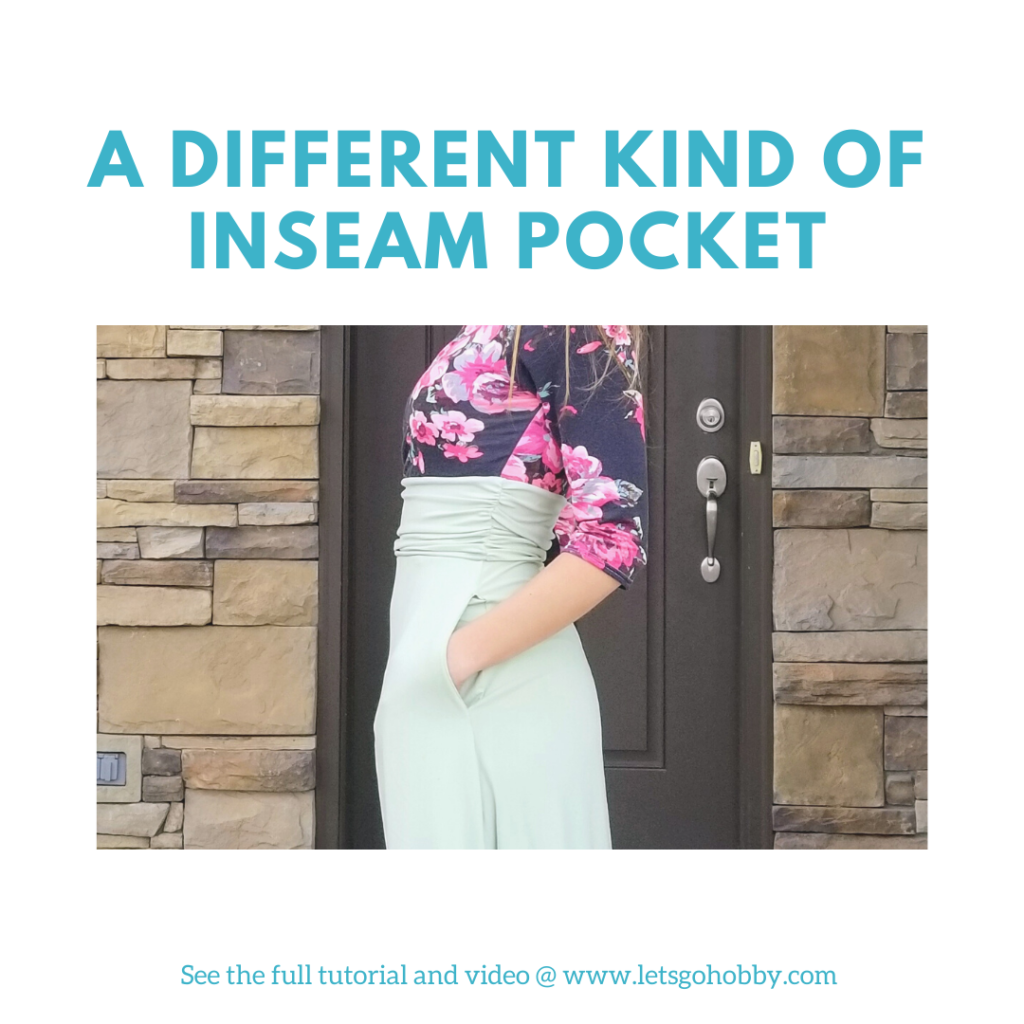
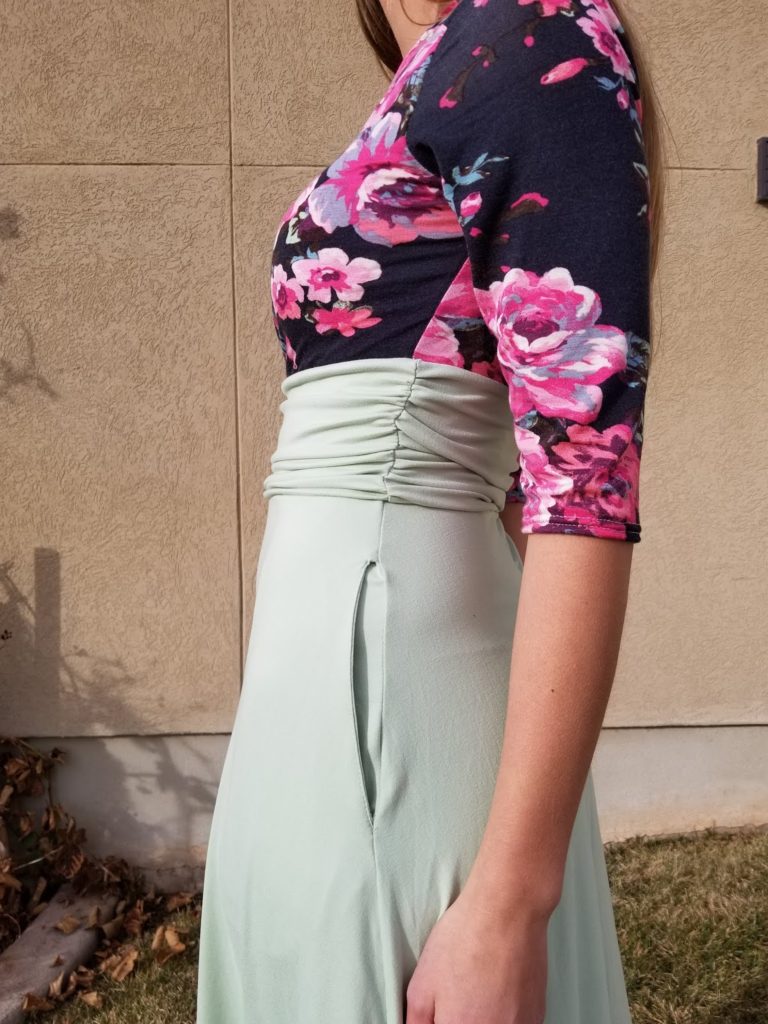
I made a video about how to construct these pockets and also took pictures. The final pocket was sewn into the Rebecca Page Carolina Dress. You can see my post about the dress HERE. And below is a picture of the Carolina dress with pocket.

The way these pockets are constructed is different than the normal inseam pocket seen in most patterns.
Traditional Inseam Pockets
Normally for inseam pockets, you have a tear drop shaped pattern piece which you cut 2 mirror images of. You then attach one side of the pocket to the front of the garment at the side seam, and one to the back of the garment at the same height (hopefully you measure well!).
You might now top stitch, then sew down the side seam and around the pocket pieces to form the pocket bag. If using a serger, you might first use a sewing machine at the top and bottom of the pocket bag to ensure a clean turn so that the pockets lay flat at the top/bottom edges. You might then clip into the angle top and bottom at the turn to remove bulk.
This method for sewing inseam pockets would be necessary if your garment is all one piece with no waist seam or band. So, for a full dress or romper with no seam at the waist, for example, the normal inseam pocket would be the only option. But, for a garment with a seam at the waist, you might like this new way better.
So, the issue that can arise with the regular inseam pocket is in getting the details right – measuring down properly, getting the pieces of the pocket bag lined up perfectly, getting the turn right, and clipping the bulk well.
Many times, the pocket bag will gape if done wrong and if not tacked down, the bag will move around inside the garment and cause the bulkiness around it, especially with less stable fabrics.
Awesome Inseam Pockets
With this new method, you take out some of the difficulty and have a pocket that can support more weight, and stays put.
I will start by showing you the video I made and then explain the steps in pictures below that for clarity! Excuse my amateur video skills!
How to Construct the Pocket
Here are the steps for construction in pictures and with descriptions:
Step 1 – Draft a slightly different shaped pocket piece
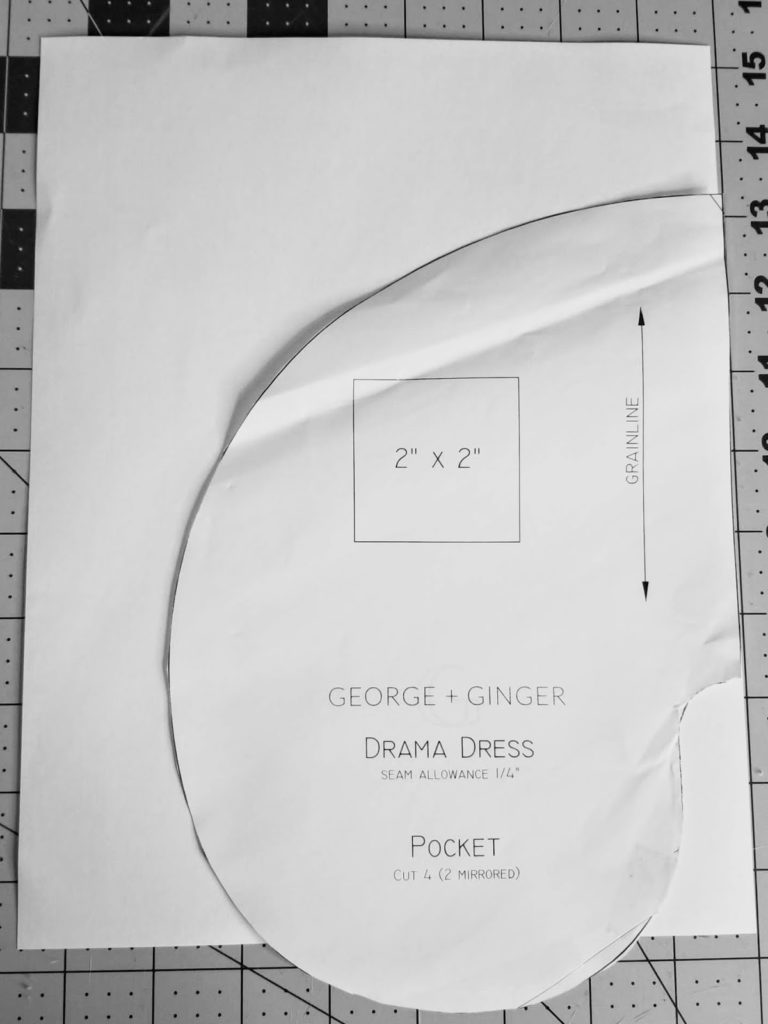
I used the Drama Dress pocket piece from George and Ginger as my base, but any similar looking inseam pocket piece will do (you can even just freehand draw this if you choose).
Grab a piece or two of scrap paper and lay your pocket piece on top. You will then extend the top of the pocket piece up as high as you want the pocket to be down from the waist seam. (I personally like my pockets higher as to not put the opening of the pocket right at the widest part of my hips as this tends to make any pocket gape.)
You will also add about a half an inch extra at the bottom of the pocket opening. This is where the pocket will be sewn into the side seam of the garment. You can use a french curve for this step or just make a nice curve at the top and bottom following along with your base pocket piece.
Your new finished pocket piece will look like this:
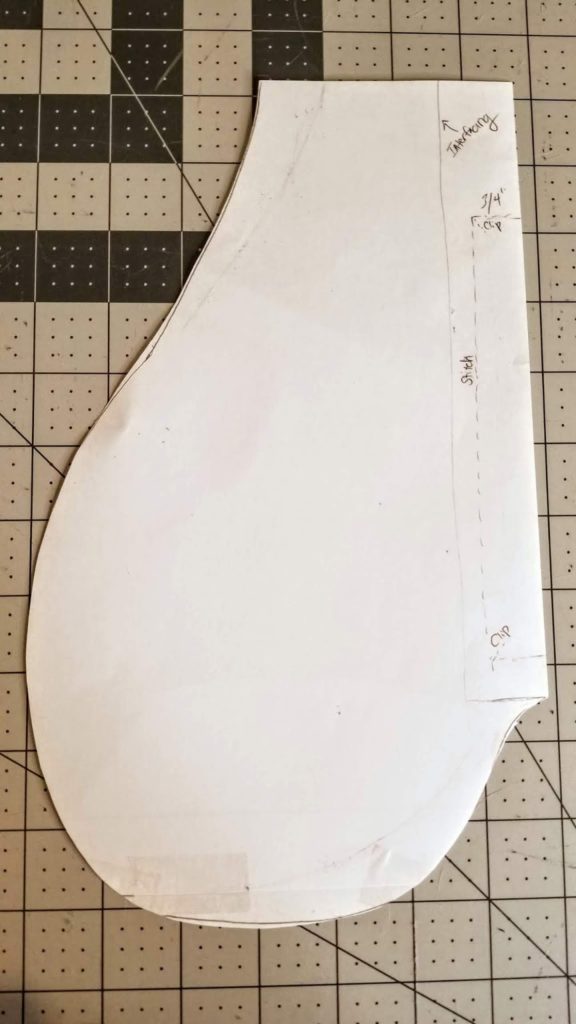
As you can see in the picture above, there is a rectangle of interfacing along the flat side of the pocket. The interfacing is not necessary, but definitely recommended.
I used Pellon Shapeflex interfacing. Then there is a smaller rectangle which will become the cut out of your pocket opening. The size of the smaller rectangle will depend on:
- How long you want your pocket opening to be (size of pocket opening)
- The seam allowance as it will determine the depth of the rectangle.
You should make the depth of the rectangle 1/8″ larger than your seam allowance. The seam allowance on the dress I made was 3/8″, so I made the rectangle 1/2″ wide.
Step 2 – Cut Out Pocket Pieces:
Cut out 2 mirrored pocket pieces each, so 4 total pocket pieces.
Step 3 – Assemble Pocket
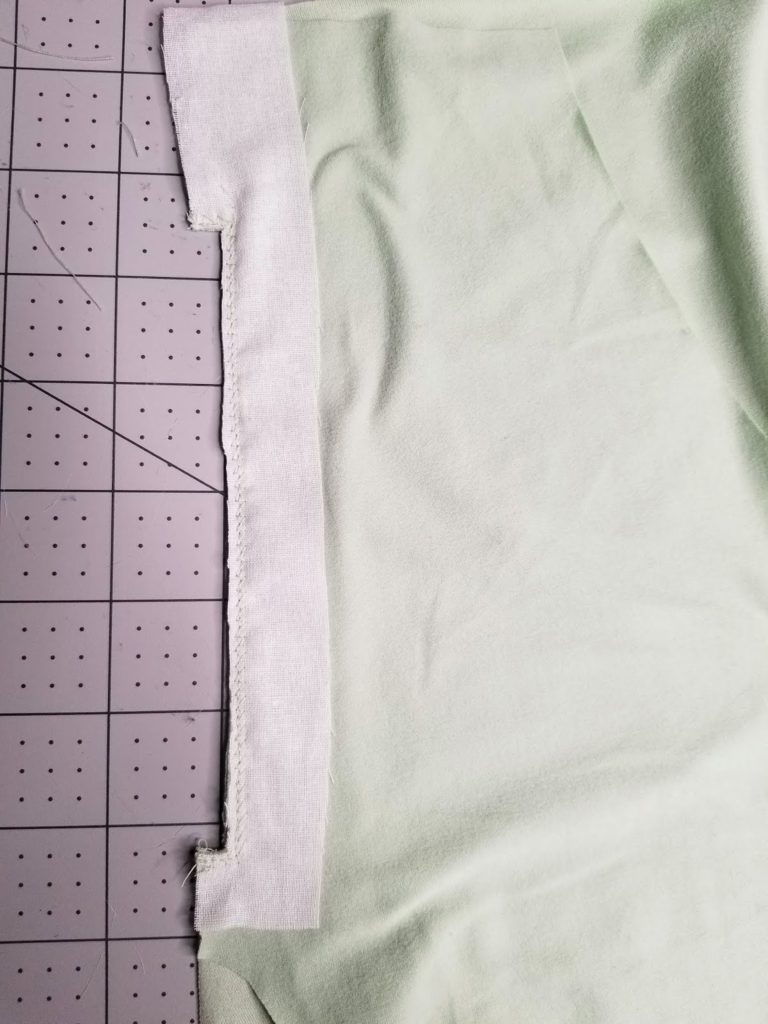
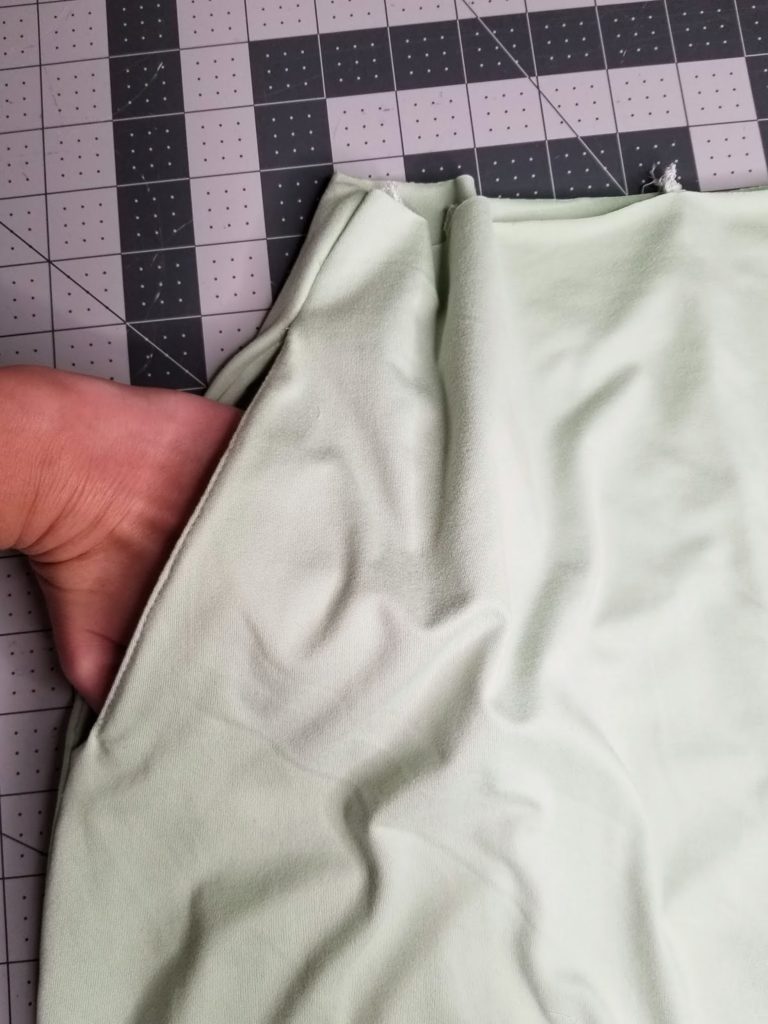
A. Lay 1 pocket piece right sides together with the front of the garment as seen below. If using interfacing, it will be put on top wrong sides together with the pocket piece.
B. Sew a rectangle shape starting at the top of where the bag opening will be, and ending at the bottom of the bag opening. See step 1 for guidance on the width of the rectangle.
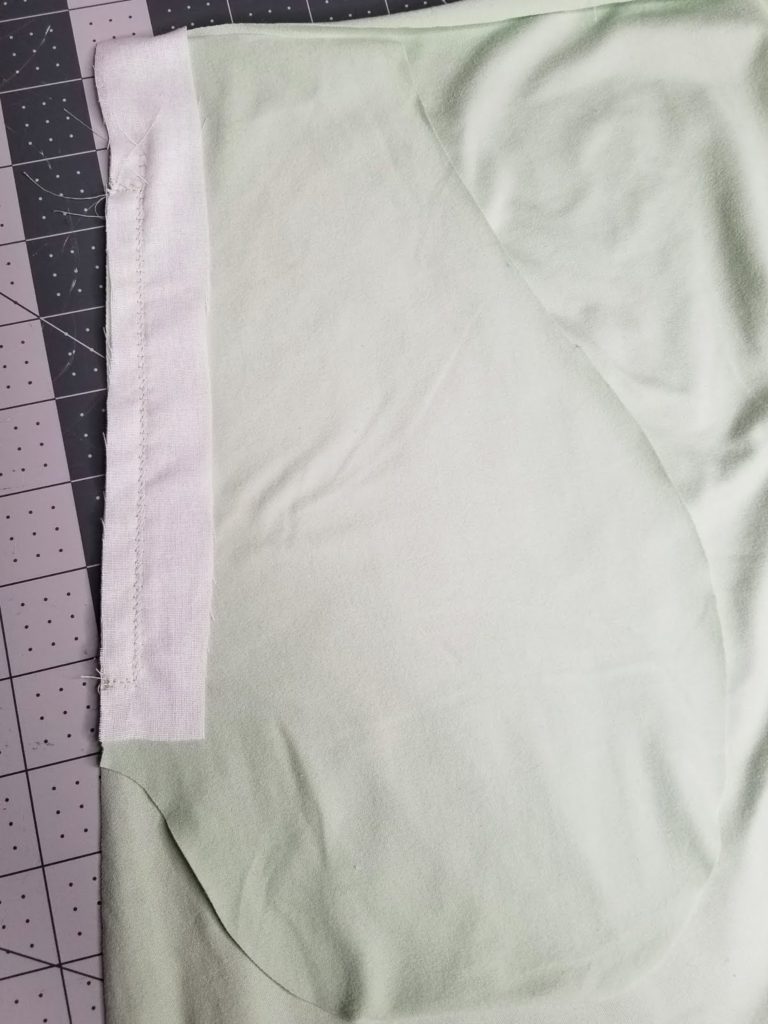
C. Cut around the rectangle and snip in at the 90 degree corners being careful not to cut through stitching.
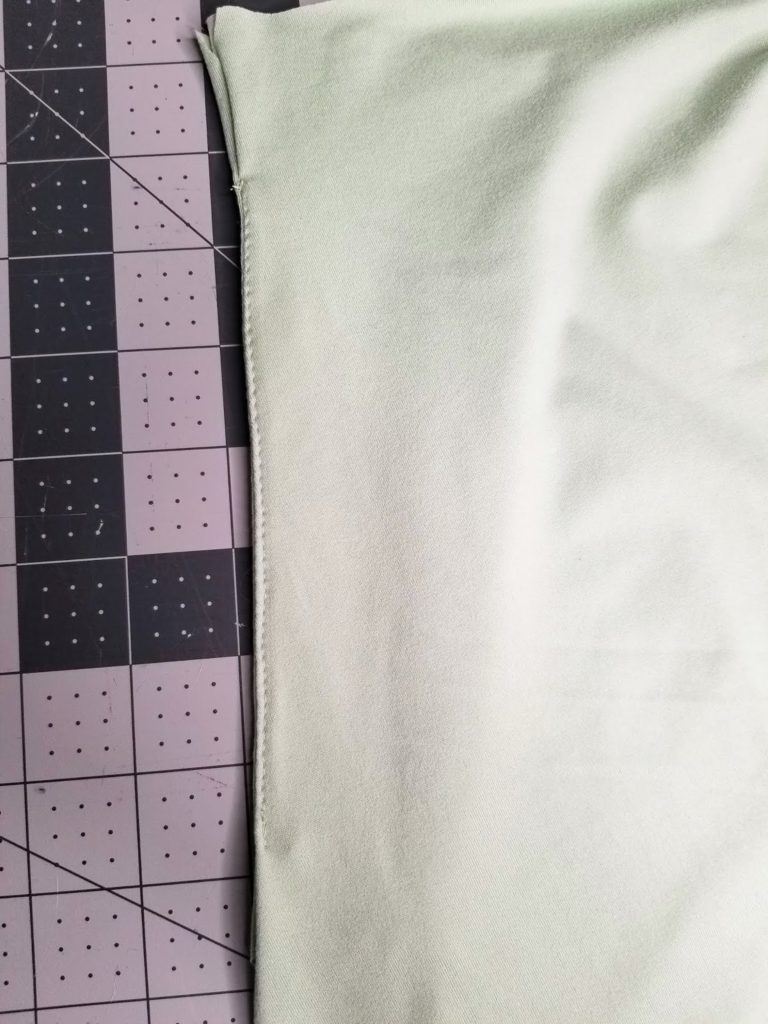
D. Optionally, you can flip the top pocket piece to the back, wrong sides together, and topstitch 1/8″ away from the edge as seen below. Only stitch inside the rectangle cut out area.
E. Flip the first pocket piece out to the side, then lay the mirrored pocket piece on top right sides together – clip/pin.

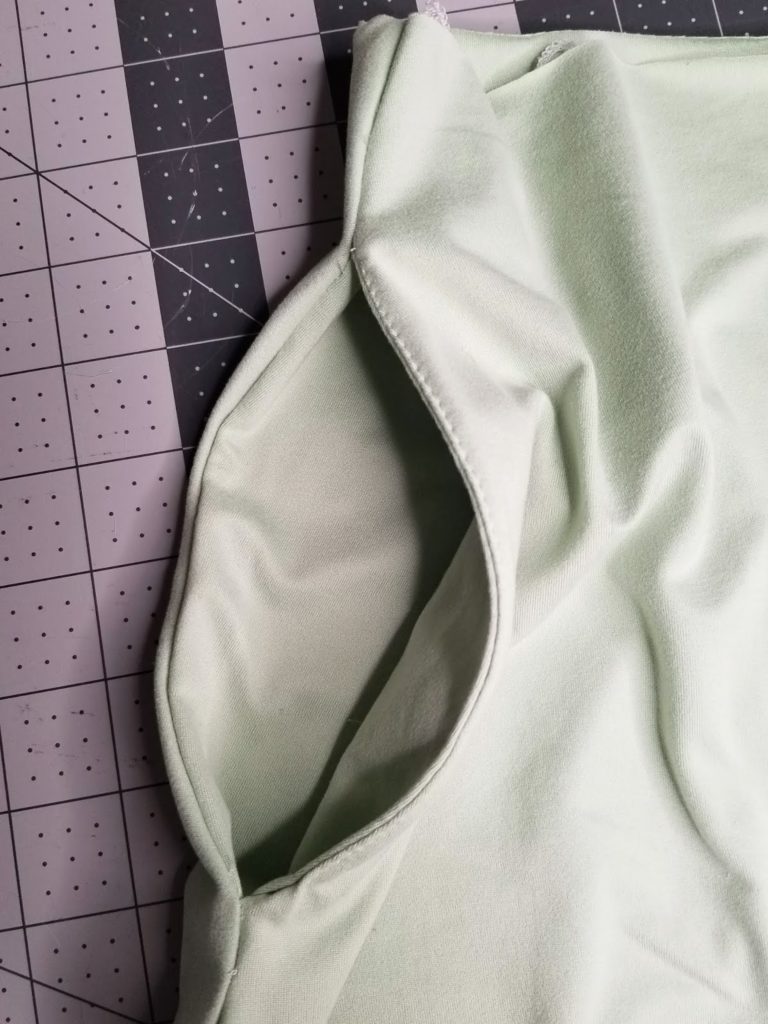
F. Sew around the outer curved edge of the pocket bag being sure to stop sewing at the bottom of the curve as seen below.
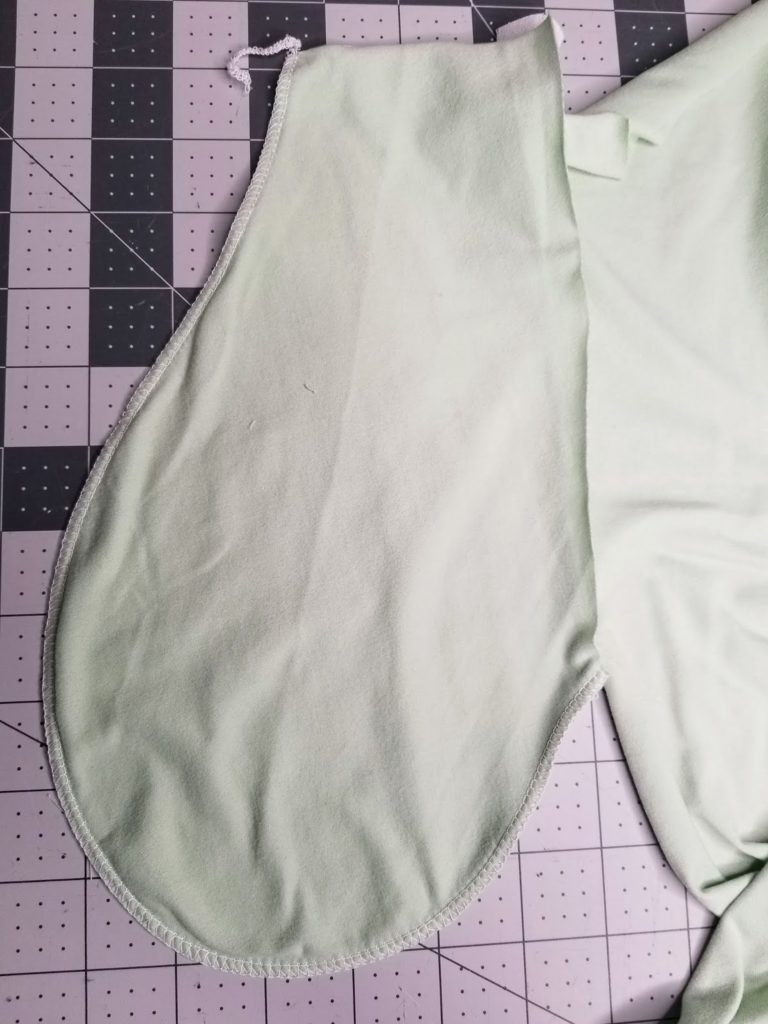
G. Now turn the pocket bag right side out and align the edge of the second pocket piece with the side seams of the front of the garment an pin/clip.
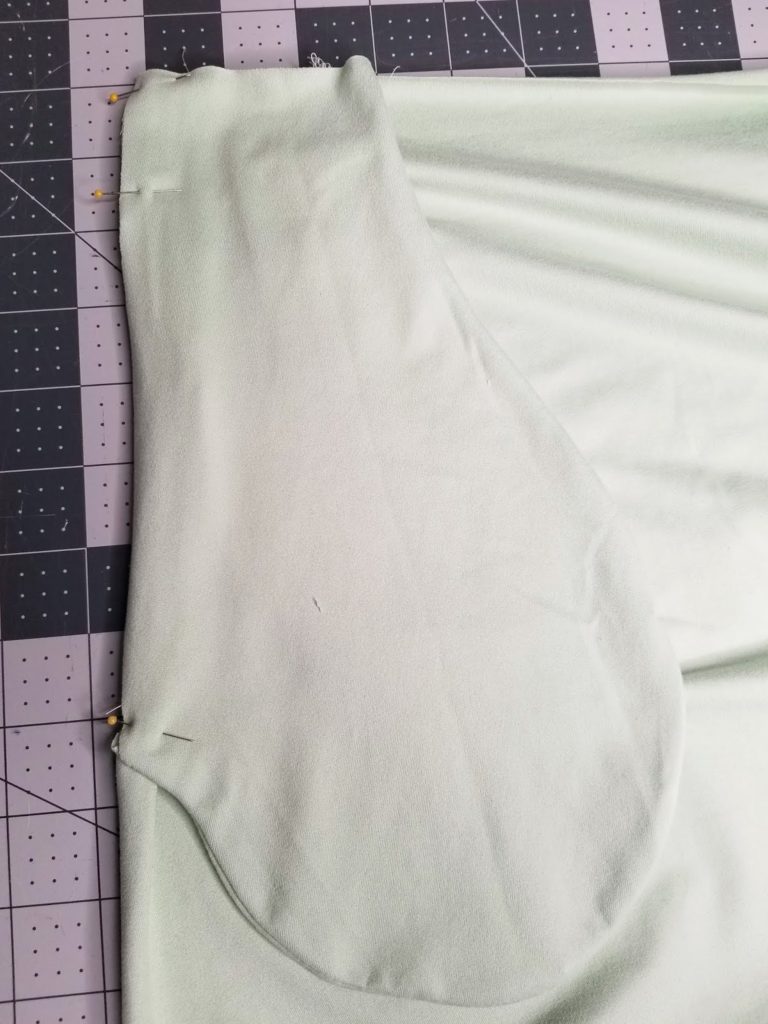
All three layers will be pinned at the top and bottom of the pocket bag, but the cut out you sewed and clipped, will stay out of the way as seen below.

H. Lay the back of the garment right sides together on top of the front and pocket bag pieces and pin/clip.

I. Sew down the side seam being sure to catch all 4 layers at the top and bottom sides of the pocket bag. You can push the cut out of the pocket in to be sure not to catch that part (like I forgot to! :)) as you sew down the side seams.

You are done! Now you can press the side seams if desired or top stitch the back of the pocket at the side seam if you choose.
You may want to baste the top of the pocket to the top of the garment for ease of attaching it to the waist.
While this may look like a lot of steps, it’s really just because I broke it down completely, once you try the method out, it will come together faster than it seems!

I hope this tutorial made sense and helps you in your sewing endeavors! Feel free to ask questions below if you need any additional help or clarification!
Happy Sewing!
This post contains affiliate links.


I love your tutorial on inseam pockets…thank you!
This is great! Is the pattern for the pocket available?
Thanks for asking about it. I didn’t make any pattern for it, I just trace it using the pants or skirt pattern piece so that it matches the shape.
I meant to ask – if there was a link to the pocket pattern. Thanks.
How does the top part of the pocket bag not get stuck on the outside of the garment with this method? I feel like I’m missing a step..
The top edge of the pocket aligns with the waist seam. Is that what you are referring to?
I found this great how too when adding pockets to a pattern and made the same mistake. On Step G, when laying the pocket bag right sides out against the front, it’ll be on the wrong side of the front piece. In step I, the front and back are right sides together, but the pocket bag isn’t between them, it’s on the wrong side of the front.
Luckily to fix I just had to unpick the serge seam at the top and bottom of the pocket opening and could realign and serge with the knife down.
Once I figured it out I did three more super quick.