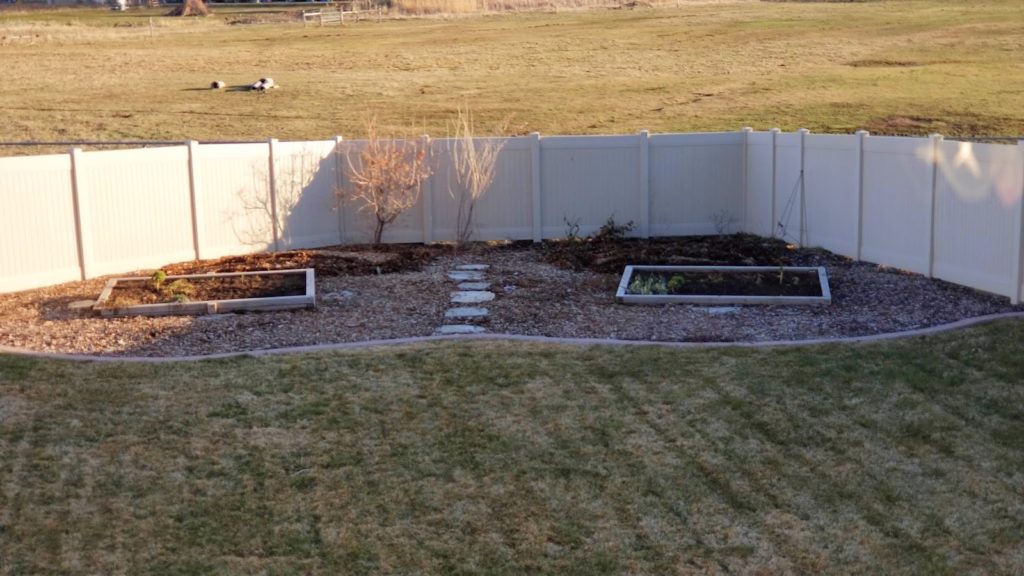
Below is a picture of my gardening area currently (March is not colorful!). This area used to be lawn, but we cut out this corner of the yard for my gardening area about 5 years ago.

I started with two raised beds with plans to make more in the future, but, #life. I also have plans for the future to add a fence across the front area and grow grapes on it. There will be an arbor at the center where the stones are with either more grapes or vining roses up the sides.
Around the perimeter I currently have two smoke bushes, two mock orange bushes, and a rose bush. I also have 2 service berry trees and some raspberries.

I plan to fill in the rest of the edge along the fence with more edible berries, flowers, herbs, and two small fruit trees. Oh, if only I had unlimited amounts of time and money to get it all done now!
I’ve always done raised beds in the past which have for the most part worked great. However, I wanted more space to grow since I only have two medium sized raised garden beds.

I’ve also always wanted to plant in the ground, just to try it you know? Plus, raised beds are awesome, but a bit cost prohibitive if you want to use long lasting untreated wood and fill them with good soil.
I heard about the Garden of Eden Method last year and figured it would be a great way to add more growing space for an affordable price.
Garden of Eden Method
The Garden of Eden Method was created by a man named Paul Gautchi. He put out a whole video on his method of gardening.
Now, the video is heavily sprinkled with religious overtones, however the gardening bits are quite good. So, if the religious part is not your gig, just ignor that part when you watch it! You can watch that video on YouTube HERE if you’re interested.
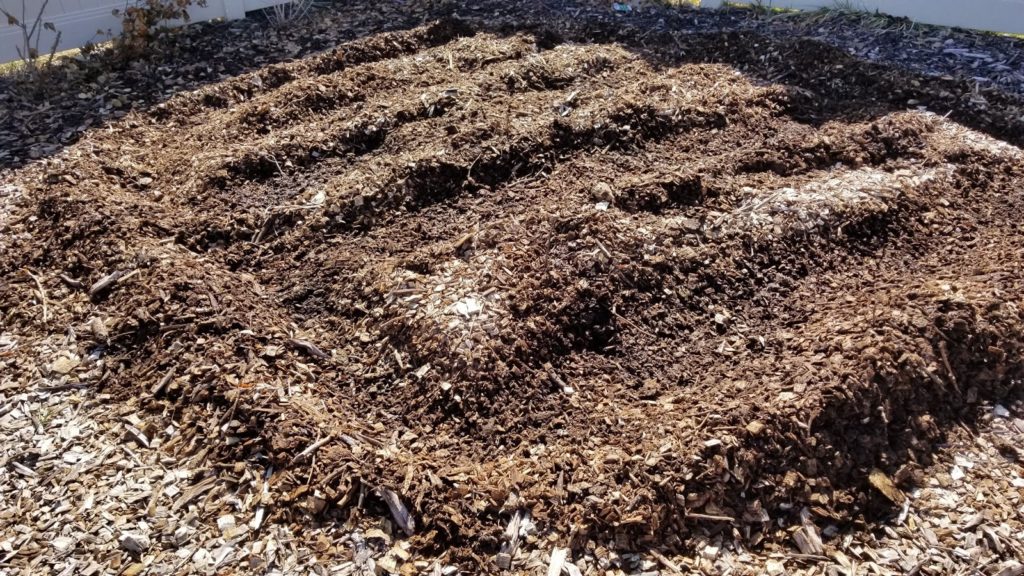
Below is a picture of one of my Garden of Eden areas which I raked rows out of to let them warm up for planting.
The idea of the Garden of Eden or Back to Eden method, is that in nature, soil is never uncovered.
Think of a forest floor, it’s always covered in leaves, branches, and other plant debris. And that plant debris decomposes over time to become part of the rich humus soil underneath.
The benefits of this are that the soil underneath the layer of plant debris (or mulch) stays moist for much longer than exposed soil (you won’t need to water as often, or possibly ever except after planting seeds if you live in a rainy climate). Also, the thick layer of mulch, keeps unwanted weeds at bay.
Translated to the home garden, this means that you start with:
- Any old patch of land,
- Add a layer of newspaper or cardboard if it’s a weedy spot,
- Lay down 4 inches of compost,
- Then add 4-6 inches of wood chips on top of that.
Compost
The compost you use is up to you. You can use chicken, cow, rabbit, etc. manure. Make sure it’s composted before you plant in it! You can also use compost from decomposed trees and the sort from your local landfill. Or even your own homemade compost from kitchen scraps.
You will need a lot though. 4 inches on top of the area you plan to plant in! I added 2 cubic yards of organic composed chicken manure to 2, 10′ x 12′ beds.
Wood Chips
To be clear, bark is not wood chips. Paul Gautchi is referring to a tree with leaves that is put through a chipper.
I got wood chips for free using a service called Chip Drop where arborists in the area drop chips on a requested driveway instead of hauling the chips to the dump.
This saves the arborist time and money (dump fees) and gives you free wood chips. HERE is the link for that site if you want to sign up. Keep in mind, you can sign up or take yourself off the list at any time, but there is no defined date or time of drop. And it might take 2 days or 2 months to actually receive a drop. It’s all chance on who is cutting down trees in your area.
From the research I did, you should request not to receive chips from certain trees including black walnut trees and eucalyptus trees (not great to grow veggies in). Also, pine trees take a long time to break down due to the resin, so this may not be a good choice either.
In the best case scenario, the wood chips will be slightly decomposed at the time of addition to the garden. I put my two Garden of Eden Method beds last fall, so the chips have sat there for for about 7 months so far.
It will be interesting to see how well my plants grow in these beds this year. It may be that each year, the soil becomes a bit better and so do the plants.
Planting
To plant, you will need to pull the bark chips off of the soil where you want to plant first. If you are planting seeds, you will keep the wood chips away from the area where the seed is planted until the plant becomes established, then move the wood chips around the base of the plant to keep the soil moist. If you are planting starts, you can move the chips back around the plant after planting.
Add More Compost!
During the planting and growing, you will need to add applications of nitrogen rich compost, manure, or fertilizer over the top of the wood chips (everything will soak down into the soil from above).
As long as the wood chips are on top of the soil and not mixed into it, it won’t be stealing all the nitrogen from the plants, they just won’t be providing it either.
My observations so far is that the soil under the chips definitely stays more wet. In late winter, while my raised beds were not quite dry, the soil under the Garden of Eden beds was soggy. The wood chips are already starting to break down after only a half a year, so I know some benefit there is already starting.
Bugs
There are a lot of little creatures in the Garden of Eden beds. In my raised beds I’ve seen earth worms, ants, and spiders. In the Garden of Eden beds I’ve already spotted earth worms, centipedes, potato bugs, and more.
The one issue I’ve had at this point is that there are a large amount of gnats flying around the tops of the wood chips. After further research, I’ve realized that the gnats are called midges.
Midges LOVE decompsing organic materials. Which is also what vegetables love. To mitigate the midges, I’ve used yellow sticy traps and a product called Mosquito Bits which is just a bacteria that kills the midges larvae when injested.
If you have any questions for me, please let me know in the comments below. If you have tried this method of gardening before and have any tips, please leave them in the comments below as well. I’d love to hear from you!
Happy Gardening!


